


Download CompX eLock files for Armstrong Medical

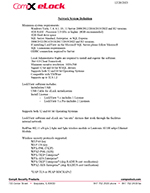

Lockview 5.x Setup (for LockView 4.5.2 users)
Note: An upgrade to LockView 5.x is not available to LockView 4.x users without a valid Technical Support Agreement. Please contact CompX eLock customer service to renew your Technical Support Agreement or your reseller to purchase LockView 5.x. ** If you have a valid Technical Support Agreement and are upgrading to LockView v5, you must contact CompX for a new License Site Key to register the software Be sure to read the Upgrade Support Instructions before installing the software if using an SQL database.
To save this setup to disk for installation at another time:
- In the File Download box, select Save this program to disk.
- Save the file named “lv565_compx.zip” to your hard drive. Extract the .zip file.
- When you’re ready to install, locate the extracted files on your hard drive and double-click the Setup.exe file to begin installation.
To download and run this setup now:
- In the File Download box, select Run this program from its current location
- Upon download, the InstallShield Wizard will guide you through the setup.
** Please note: An upgrade to Lockview 5.x is not available to LockView 2.x or 3.x software. Please contact your reseller to purchase and upgrade to LockView 5.x. **
Need help? Call the eLock help line at 847.752.2525.
NOTE: If you do not have a software serial number, please contact your reseller to purchase one.
Firmware Updates
Click to download the Armstrong lock firmware.
v1.104352 (Jun 14 2019)
Move the downloaded firmware file to the computer on which LockView is installed.
In LockView:
- Click on Window
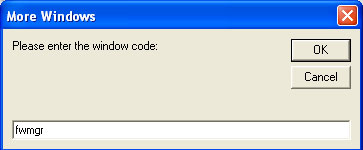
- Click on More Windows…
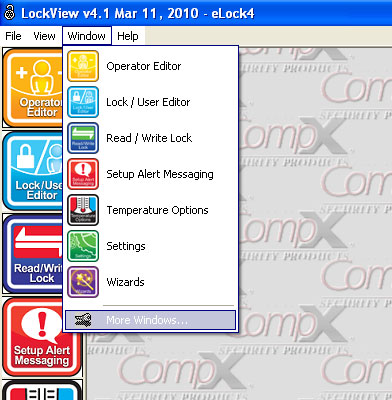
- type fwmgr
- Click OK
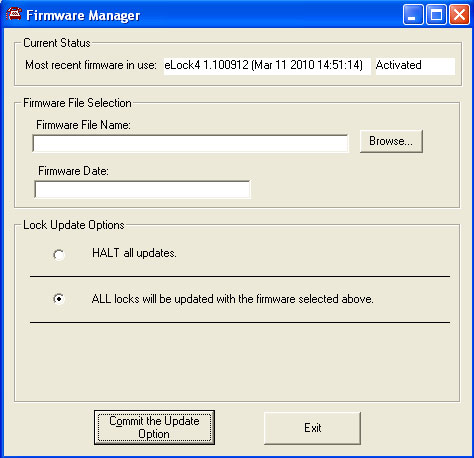
- Click Browse…
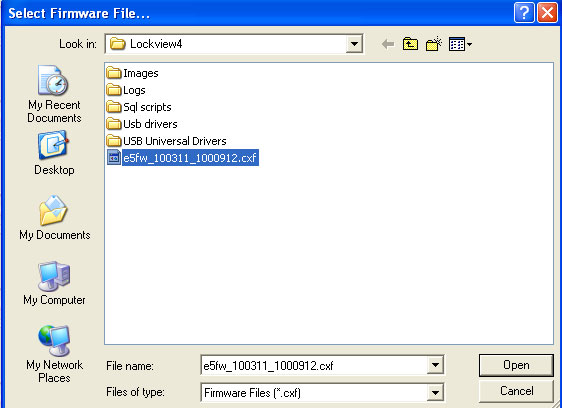
- Navigate to the location of the firmware file
(in the example above, the file has been saved to the Lockview4 folder) - Double click on the firmware file name
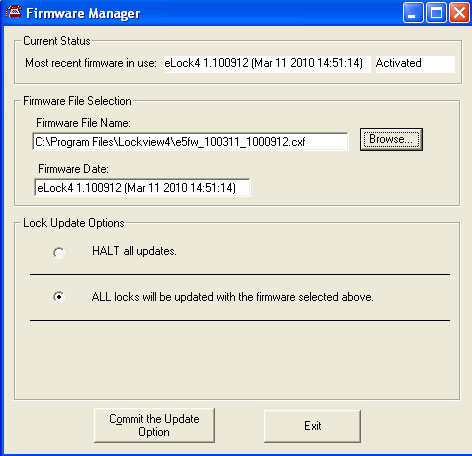
- Confirm the Firmware File Name: and Firmware Date: are correct
- Click Commit the Update Option
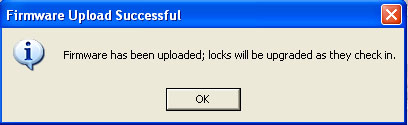
The above will appear.
For networked eLocks, the firmware will automatically upload the next time the eLock(s) check-in to the network. To initiate an immediate upload for networked eLocks press the NETWORK button on each eLock or attach the USB cable to each eLock and connect to LockView.
For stand-alone eLocks, attach the USB cable to each eLock and connect to LockView.
WARNING! Once the firmware begins to upload (step 9), it is critical that the process is completed before disconnecting the eLock(s).
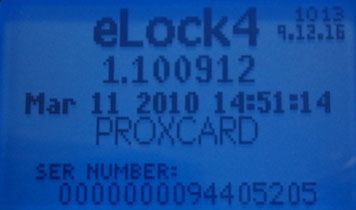
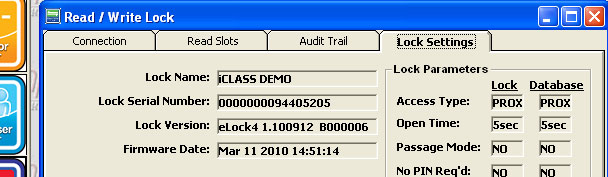
Confirm the firmware version has successfully uploaded at the eLock by pressing BACK/CANCEL button. The above will appear on the eLock LCD; verify this matches what is in LockView under Read/Write Lock; Lock Settings (below).